A Guide to Monitoring Blood Glucose at Home
This post was reviewed by our Director of Clinical Excellence and Oversight.
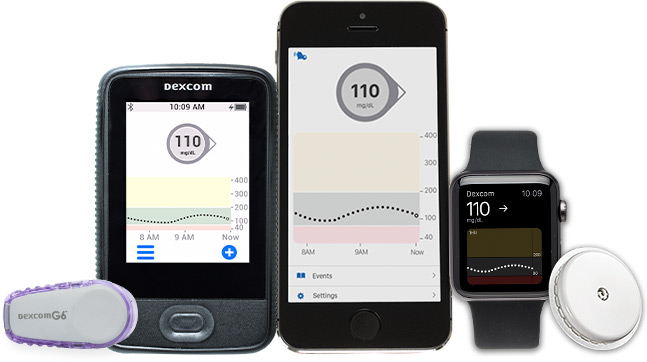
Monitoring glucose levels at home can be a big life change, but don’t worry; great advances in medical technology have helped make it quite manageable and easy to do. Modern blood glucose systems are simple to use and very accurate. With a little understanding and a bit of practice, you’ll have no trouble making it part of your daily routine. This article focuses on BGMs. To learn more about CGM, read guide to continuous glucose monitors.

About Blood Glucose Meters
Blood glucose meters are devices that measure the amount of sugar in the blood. They do this by reading the electricity the test strip creates turning it into a readable number. There are different models of glucose meters, but they all must pass strict FDA ratings in order to be used. For accurate results, make sure that the meter you purchase comes from a reliable manufacturer. (We only carry monitors approved by the FDA, so if you got came from us, then you’re good to go!)
Here are some helpful tidbits about glucose monitors you should know:
- Don’t compare results from one meter to the results of another. Each meter is slightly different, so the numbers probably won’t be identical.
- Testing strips are unique to the glucose meter. This means you can only use testing strips made for the meter you have. Don’t try to use strips made for a different device; they won’t work correctly.
- Many glucose meters will actually keep record of all the glucose tests it performs, but it’s also a good idea to keep a written record of each test in a notebook for reference.
About Control Tests
A great way to learn about monitoring blood glucose is to perform a control test. Control tests ensure that the meter is accurate by checking it against a control sugar solution with a known glucose level. They also will provide a general understanding of how the blood testing process works.
To perform a control test, you need three things: Control solution, the glucose meter, and test strips. In order for the test to work, these need to come from the same manufacturer. Don’t mix and match these parts with other glucose monitoring systems.
- The control solution – Control solution is a small bottle of liquid with a known sugar concentration already dissolved into it. Because the solution is already known, it can be used to determine the accuracy of a glucose meter rating. Sometimes, you might see a control solution labeled with a certain level. This happens when a manufacturer has two different control solutions with different sugar levels. It’s important to know the control solution level in order to get an accurate result.
- The Test Strips – The test strips absorb the control solution and transfer it to the glucose meter. Each container of test strips will have ranges printed on the label. These are the test ranges used to determine the accuracy of the meter. The first number is the level of the test solution, and the second is the glucose range the meter should read. Make sure the control solution level is matched with the correct range on the test strips.
- Glucose Meter – The glucose meter reads the results of the control test. The number that appears on the display should fall between the range that’s labeled on the test strips.
Performing a Control Test
To perform the test itself, follow the instructions provided by the manufacturer. While the process is generally similar between brands, there may be some slight differences that can affect the results. The best thing to do is simply follow the control test instructions for your glucose meter.
If, for any reason, you think your glucose meter is no longer accurate, you should run a control test. This is particularly true if the glucose meter has been dropped or experienced other trauma that may cause damage. Another situation in which a control test is advisable is if the meter reads an incredibly high or low blood sugar level.
Wash Before Testing
Clean hands are an important part monitoring blood glucose for two reasons. First, it will help prevent illness and infections. Secondly, it helps ensure that your meter reading is accurate. Make sure you wash regularly throughout the day, especially after the following activities:
- Handling any food.
- Using the restroom.
- Changing diapers and providing incontinence care.
- Caring for someone who is ill
- Touching an animal or animal waste.
- Treating an injury or wound.
- Before and after using any medications
Using Lancets
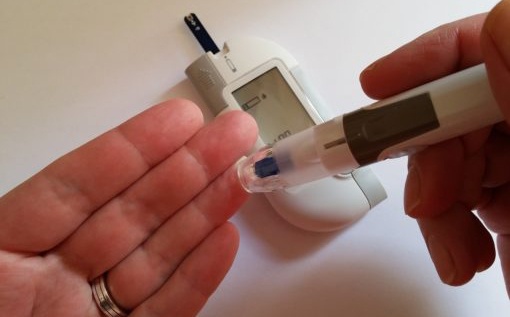
Lancets are thin, sharp slivers of metal used to draw blood for a glucose test. They create a tiny puncture in the skin from which a drop of blood can be collected. Because they enter the body, lancets should be treated very carefully. There are some important safety procedures to follow that will help prevent possible infections.
- Use a new lancet for every test. Old lancets can be dull or contaminated, which can cause infection and make it harder to get a good
reading. - Use a puncture-resistant container to store and discard lancets.
- Do not store lancets in a place easily accessed by young children.
- Never share your lancet device with others. It may contain blood from previous testing, which greatly increases risk of infection.
Care for Test Strips
Testing strips are a marvel of technology that allow a glucose meter to accurately read the levels of glucose in the blood. They work by using enzymes and special chemicals to absorb a drop of blood and convert the sugar into electricity. The meter reads this electricity and then determines how much sugar was used to create it.
Because they are quite sophisticated, it’s important that test strips be cared for properly. Here are some important tips for making sure test strips remain usable.
- Don’t store them in the bathroom or any place that is humid, as the moisture can degrade the chemicals on the strip.
- Keep them away from hot areas; heat breaks down the enzymes needed for accurate readings.
- Check the expiration date on the test strip bottle. If the strips have expired, DO NOT USE THEM. The reading will be inaccurate.
- Make sure you write down the date you open a new bottle. Test strips often are only good for short time (generally three months) once they’ve been opened. Check the manufacturer’s instructions to learn when your specific strips expire.
- Always store test strips in the original bottle; do not store them in another container or combine them with other strips.
- Discard the strips three months (or per manufacturer instructions) from the date they are opened. They have expired at that time, even if the expiration date on the bottle has not yet arrived.
For more helpful tips about monitoring blood glucose or managing diabetes, visit our education center. It provides lots of useful information about ways to help you maintain a great quality of life. And of course, feel free to call us directly. We’re always happy to answer your questions.
Get Insurance-Covered CGM & Diabetes Supplies
Monthly Deliveries | We Handle the Paperwork

Disclaimer:
Unless otherwise noted, the recommendations in this document were obtained from the sources indicated. Be advised that information contained herein is intended to serve as a useful reference for informational purposes only. HCD cannot be held responsible for the continued accuracy of or for any errors or omissions in the information. All trademarks and registered trademarks are the property of their respective owners.
